

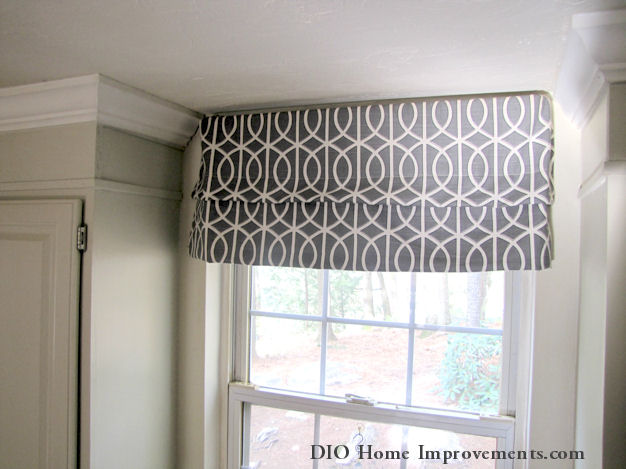
I’ve been receiving a lot of emails from the Better Homes & Garden feature for instructions on how I made my Faux Roman Shade. So here it is (This tutorial is shown using photos of extra fabric I had around the house, I did not take photos during the making of this shade the material in the photos below was not ironed or stitched for these photos)!
The fabric I used in this is Dwell Studio Bella Porte Slub I have it in Charcoal and in Brindle. The Brindle is more brown/gray the charcoal is more blue/gray. My finished faux roman shade is 24″ high. The piece of material I used before stitching was about 27″ long. I also moved the curtain rod up to the ceiling.
Step One: Iron the material, fold the sides over about a half of an inch and press the sides down with the iron to make stitching them easier (pressing the sides down is optional but will make stitching faster) stitch the sides.

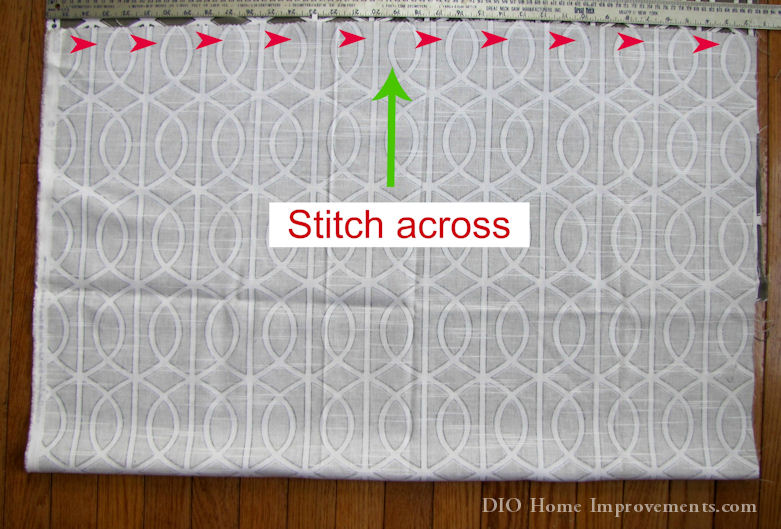
Step Two: Fold the fabric up so the bottom edge is sitting on the top edge and stitch across the top (fabric will be right side in at this point).
Step Three: Turn the fabric right side out, the fabric should be one big loop. Stitch across the top about 2″ down (this is where the curtain rod will slip into).

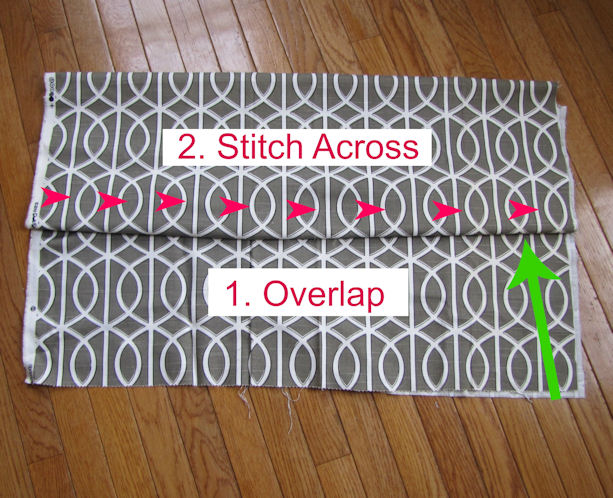
Step Four: Final Step! Gather the material about halfway down, pull up and form a 2″ overlap, pin and stitch this overlap in place.
That’s it you are now ready to hang your faux roman shade! Because I’m somewhat frugal I wanted to keep the cheap roller shade but didn’t like how it looked at night. It was too bland looking. So I took some extra fabric and attached the fabric to the roller shade with some spray adhesive.


For instructions on the roller shade head on over to First Home Love Life I posted a tutorial over there!
3 comments for “Faux Roman Shade”